When water damage occurs, the problem is often bigger than what you can see.
A burst pipe, roof leak, failed water heater, sump pump issue, sewage backup, or heavy rainfall can quickly push moisture into floors, walls, ceilings, and structural components.
If you are looking for a step-by-step water damage cleanup process explained, you want to know what happens after the first leak, puddle, stain, or musty odor appears.
For water damage in Johnstown concerns, the key is understanding that proper cleanup goes beyond visible water. It includes inspection, water removal, drying and dehumidification, cleaning, mold prevention, repairs, and, when needed, mold remediation.
Here is how the water damage cleanup process works from start to finish.
Key Takeaways
- Water damage cleanup works best when it follows a clear process, from inspection and water removal to drying, cleaning, and repairs.
- Hidden moisture can cause mold growth, structural damage, health risks, and costly repairs if it is not addressed quickly.
- Regular maintenance and fast response can help prevent water damage from spreading and protect your home long term.
Why Water Damage Cleanup Needs a Step-by-Step Process
Water damage can escalate quickly. Moisture can move into drywall, flooring, insulation, cabinets, trim, and the home’s structure before the full damage is immediately visible. If cleanup is delayed, the risk of mold growth, structural damage, health risks, and costly repairs increases.
A step-by-step restoration process helps stop further damage, remove moisture, clean affected areas, and return the property to its pre-loss condition. It also helps identify hidden problems before final repairs begin.
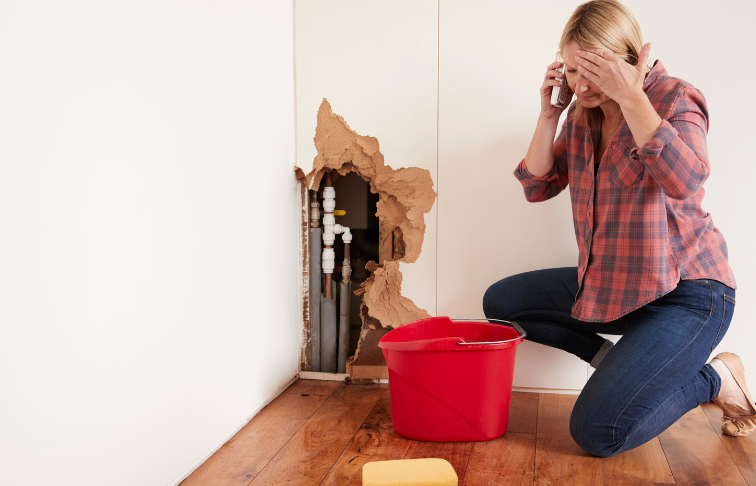
Step 1: Emergency Contact and Fast Response
The process usually starts with a call to a water damage restoration company. During that first call, you may be asked what happened, where the water came from, how long it has been present, whether there is standing water, and whether the source is still active.
Fast response matters because water exposure can spread quickly. If disaster strikes during heavy rainstorms, a burst pipe, or a flooded basement, emergency water damage services may be needed right away.
While waiting for help, take photos if it is safe, move dry personal belongings away from the affected areas, and stop the water source only if you can do so safely. Avoid potentially contaminated water and unstable areas.
Step 2: Initial Assessment and Detailed Inspection
Before cleanup begins, the property needs an initial assessment and detailed inspection. A visual inspection may show obvious damage, but water can hide behind walls, under flooring, above ceilings, and inside structural components.
Common causes include roof leaks, leaking pipes, broken pipes, water heaters, washing machines, sump pump failures, sewage backups, heavy rainfall, and natural disaster events. Once the source is found, it must be stopped before restoration can move forward.
Professionals may also classify the water. Clean water from a supply line is handled differently than gray water from appliances or water that may be contaminated, such as sewage, stormwater, or floodwater. The water type affects cleaning, safety, and whether antimicrobial treatments are needed.
Moisture meters, thermal imaging, and other specialized tools help locate moisture that is not immediately visible. This helps determine where drying equipment should be placed and whether materials need to be removed.
Step 3: Stop the Water and Protect the Property
The restoration process cannot move forward properly while water is still entering the home.
Depending on the cause, stopping the water may involve shutting off a water supply, repairing a pipe, addressing roof leaks, unclogging a drain, fixing a sump pump, or securing storm-damaged areas.
In some cases, another trade may be needed. A plumber, roofer, electrician, HVAC technician, or construction professional may be brought in depending on the source and severity of the damage.
This step helps limit future damage and keeps the cleanup process moving in the right direction.
Step 4: Water Removal and Extraction
Once the area is safe and the source is controlled, water removal begins. Depending on the amount of water, professionals may use industrial pumps, submersible pumps, extraction units, powerful pumps, or wet vacuums.
Thorough extraction reduces drying time and helps prevent further damage. The less water left in flooring, carpets, walls, and structural materials, the more effective the drying process becomes.
Personal belongings may also be moved, inventoried, cleaned, dried, or discarded depending on the type of water and the extent of the damage. Hard, nonporous items may often be cleaned, while porous items exposed to contaminated water may not be safe to keep.
Step 5: Remove Damaged or Unsafe Materials
Not every wet material can be restored. Soaked insulation, damaged drywall, carpet padding, warped floors, sagging ceiling materials, and contaminated materials may need to be removed.
Removing damaged materials helps open hidden spaces so air can reach them. It also helps prevent mold growth, especially when porous materials stayed wet or were exposed to contaminated water.
This step is not about removing more than necessary. It is about taking out what cannot be safely dried, cleaned, or repaired.
Step 6: Drying and Dehumidification
After water extraction, moisture can still remain in building materials and the air. Drying and dehumidification bring the structure back to a safe moisture level.
Professionals use air movers, commercial dehumidifiers, and other drying equipment to remove moisture from affected areas. Air movers push air across wet surfaces, while dehumidifiers pull moisture from the air.
Moisture levels should be checked throughout the drying process. A room may feel dry while moisture remains under the flooring or behind the walls. Starting repairs too soon can trap moisture and lead to mold growth, odors, warped materials, or future damage.
Minor water damage may dry in a few days. Larger or more complex projects can take longer, sometimes several weeks, depending on the amount of water, humidity, airflow, and materials affected.
Step 7: Cleaning, Sanitizing, and Odor Control
Once water removal and drying are underway, affected areas need to be cleaned. The cleaning process depends on the water source and the materials involved.
Clean water damage may need basic cleaning. Water from sewage backups, appliance discharge, stormwater, or floodwater may require more detailed cleaning, protective equipment, and antimicrobial treatments depending on the level of contamination.
This step helps reduce health risks tied to bacteria, mold spores, damp materials, and contaminants. It can also help address odors caused by hidden moisture, sewage, mildew, or wet building materials.
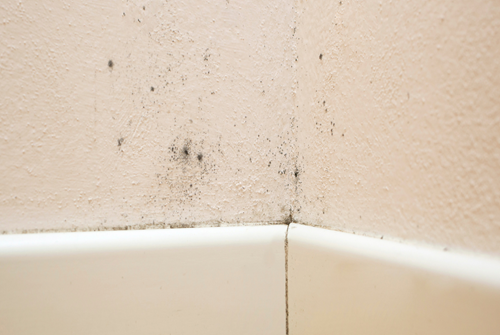
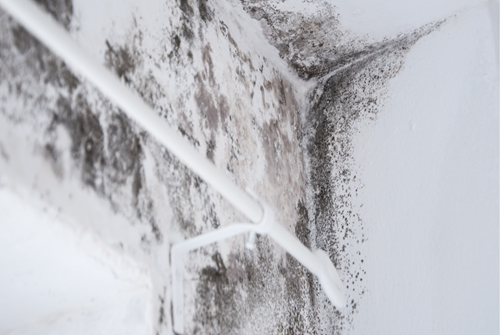
Step 8: Mold Prevention and Mold Remediation
Mold prevention is part of the restoration process. Mold growth can begin when moisture remains in drywall, insulation, flooring, trim, cabinets, or the air.
Fast water removal, drying and dehumidification, material removal, cleaning, and moisture monitoring all help prevent mold growth. If mold is visible, odors remain, materials stayed wet too long, or contaminated water was involved, mold remediation may be needed.
The goal is to address moisture before mold becomes a larger problem.
Step 9: Repairs and Reconstruction

Once the home is dry, clean, and safe, repairs can begin. Minor repairs may include replacing baseboards, patching drywall, repainting walls, or replacing small sections of flooring.
More serious water damage may require structural repairs, new flooring, ceiling repairs, insulation replacement, cabinet replacement, or reconstruction. The goal is to restore the home to its pre-damage condition or pre-loss condition, not just cover up visible damage.
Working with one team that can coordinate cleanup, drying, water damage repair, and final repairs can save time and reduce confusion.
Step 10: Final Walkthrough and Prevention Plan
Before the job is complete, the affected areas should be checked for dryness, cleanliness, odors, and repair quality. Moisture levels may also be confirmed to make sure repairs are not covering hidden dampness.
This is also the right time to review what caused the water damage. Regular maintenance can help prevent water damage before it becomes a major issue. Check for roof leaks, leaking pipes, aging appliance hoses, water heater issues, clogged drains, blocked gutters, sump pump problems, and poor drainage.
Small warning signs can become major repairs when they are ignored.
Common Causes of Water Damage in Johnstown Homes
Johnstown homeowners can experience water damage from many sources, including heavy rainfall, snowmelt, roof leaks, aging plumbing, frozen pipes, sewer issues, water heaters, and flooded basement conditions.
Older homes may also have hidden vulnerabilities, such as worn supply lines, poor drainage, outdated materials, or previous repairs that were never fully addressed.
The key is not to assume a small stain, drip, or soft spot is harmless. If water damage occurs and you are not sure how far it has spread, a detailed inspection can help prevent costly repairs later.
Water Damage Restoration Help in Johnstown, PA
When water damage disrupts your home, having one clear plan makes the recovery easier. At Keystone State Restoration, we help homeowners, landlords, and property managers move from cleanup to repair with practical guidance and professional support.
Our services include water damage restoration, mold remediation, cleaning, fire damage restoration, and home construction services. That means we can help with drying, cleanup, repairs, and larger restoration needs when damaged materials have to be rebuilt or replaced.
If water damage has affected your home or property, call Keystone State Restoration for professional help.
Conclusion
Water damage cleanup is more than removing visible water. The right process includes fast response, inspection, water removal, drying, cleaning, mold prevention, repairs, and prevention planning. If mold is present, remediation may also be needed.
Hidden moisture, delayed drying, and unrepaired leaks can lead to mold growth, structural damage, health risks, and future damage.
Acting quickly and following the proper restoration process can help protect your home, avoid costly repairs, and return your space to its pre-loss condition.
Frequently Asked Questions
What is the first step in the water damage cleanup process?
The first step is to make sure the source of the water is stopped or controlled. From there, the affected areas should be inspected so the extent of the damage, water type, and moisture levels can be properly identified before cleanup begins.
How long does the water damage cleanup process take?
It depends on the size of the affected area, the amount of moisture, the materials involved, and whether repairs are needed. Minor water damage may take a few days, while larger projects involving walls, flooring, insulation, or structural materials can take much longer.
Can water damage come back after cleanup?
Yes, water damage can return if the original source is not fixed or if hidden moisture is left behind. That is why moisture checks, proper drying, and regular maintenance are important before final repairs are completed.